
 When I tried doing a glitter gradient for the first time, I failed pretty miserably and couldn't find a tutorial for how to make it look decent to save my life. I finally figured out a version, and thought I'd share, complete with crappy quality iPhone pictures :)
First of all, prep your nails. Get your old chipped nail polish off. Don't spill acetone all over the place like I did (uh, multiple times. I don't know what my deal was). Trim them if you need to, though I love how this looks on long nails at the tips. Then buff the crap out of them. That makes my polish last at least 5x as long, and I'm rough on my hands at work.

You'll probably want to add a base coat, if you're into that. Once again, anything to make my stuff last longer than half an hour without a chip, I'll do it.
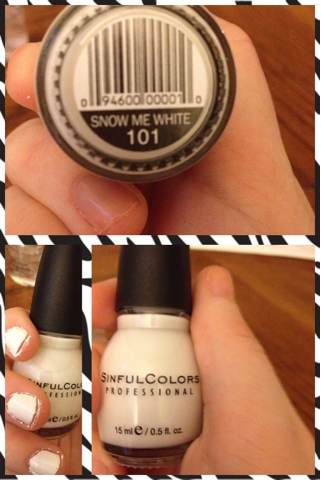
Then I did 2 coats of my base color, Snow Me White from Sinful Colors. 1 thick coat probably would have been enough, but in the small picture on the left, you can see what two coats look like. It's fully opaque and I'm actually really impressed with it. If you don't know about Sinful colors...you should. It's normally between $0.99 - $1.99 and I'll get it from Walgreens or Target.
 Let this dry extremely well. I took a nap, to be honest. A long one. And a shower.
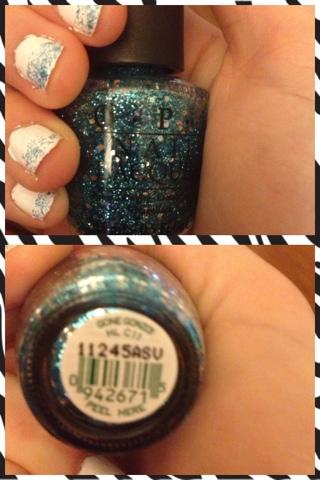
Then I used Gone Gonzo from OPI to make a single dot on the tip of each nail. I let a full drop of polish drip off the brush onto my nail, wiped most of the excess off onto the lip of the bottle, then spread it along the edge of the nail, about halfway up or so.

Again, let this dry VERY well before you start the next step.
Your final step with colored polish is to take your glitter polish again and line along the bottom of your nails, almost like you're doing a French manicure on top of the glitter that's already there. Use the remaining polish on your nails to dab glitter up above the top of halfway point on your nails where you spread the polish from the previous step. If you feel like you need to add a bit extra polish, feel free.
Finally, you will once again let this dry VERY well, then add your top coat to protect it and make it smooth so you aren't snagging everything under the sun on your glitter.
No comments:
Post a Comment